1Install & first launch
Grab SSTV-AF from the GitHub releases page as a free APK. Full install instructions live on the Download page.
The first time you open SSTV-AF, Android will ask for two permissions:
- USB device access — needed for CAT control and rig audio. Choose Always if you want the app to auto-reconnect when you replug the cable.
- Microphone — needed if you want to decode SSTV from the phone's mic instead of a wired radio. You can deny this if you only run USB.
2Set your callsign & grid
Open the Settings tab and fill in the operator card at the top. Your callsign is burned into the pictures you send, and your grid is logged with every contact, so it's worth getting right before you transmit.
- Callsign
- Your licensed callsign. It's added as an overlay on the images you transmit. Suffix portable indicators with a slash (e.g.
K1AF/M). - Grid square
- 4- or 6-character Maidenhead locator (e.g.
FN42orFN42hk). SSTV-AF will offer to fill it from GPS if location is granted. - Default mode
- The SSTV mode used when you start a transmission —
Scottie 1is a safe HF default. You can change it per picture. - TX delay
- Milliseconds the app waits after PTT before sending tones.
400works for most CAT-controlled rigs.
3Connect your radio
SSTV-AF talks to your rig over a single USB-C connection — both CAT (frequency, PTT) and audio (RX, TX) ride on the same cable. Modern Android phones connect directly with USB-C; older devices need a USB-OTG adapter. Your phone must support USB host mode.
- Plug in. Connect your phone to the rig's USB port. Android will prompt for permission to talk to the device — accept it, and tick Always so the app can reconnect later.
- Pick your rig. In Settings → Radio, open the Rig model picker and choose your transceiver (IC-7300, FT-891, IC-705, etc.).
- Set control mode to CAT. Under Control, choose CAT. (VOX, RTS, and DTR are available if your setup needs them, but CAT is what you want with a modern rig over USB.)
- Confirm CI-V / baud rate. The defaults usually match — Icom rigs default to
A4at115200; Yaesu rigs have their own conventions. If CAT won't connect, this is the first place to check. - Set the rig to USB / DATA-USB. SSTV runs in a 3 kHz SSB passband — put the rig in USB (or DATA-USB) on an SSTV frequency and you're ready to receive.
No rig? You can still explore.
If you grant the microphone permission, SSTV-AF will decode audio from your phone's mic — hold it up to a speaker playing any SSTV signal and you'll watch a picture paint in. Useful for learning the UI before you wire up CAT.
4Receive an image
Tune your rig to an SSTV calling frequency — 14.230 MHz on 20m is the classic one — and set it to USB. When a station starts sending, SSTV-AF reads the VIS header, locks onto the mode, and starts painting the picture line by line down the screen.
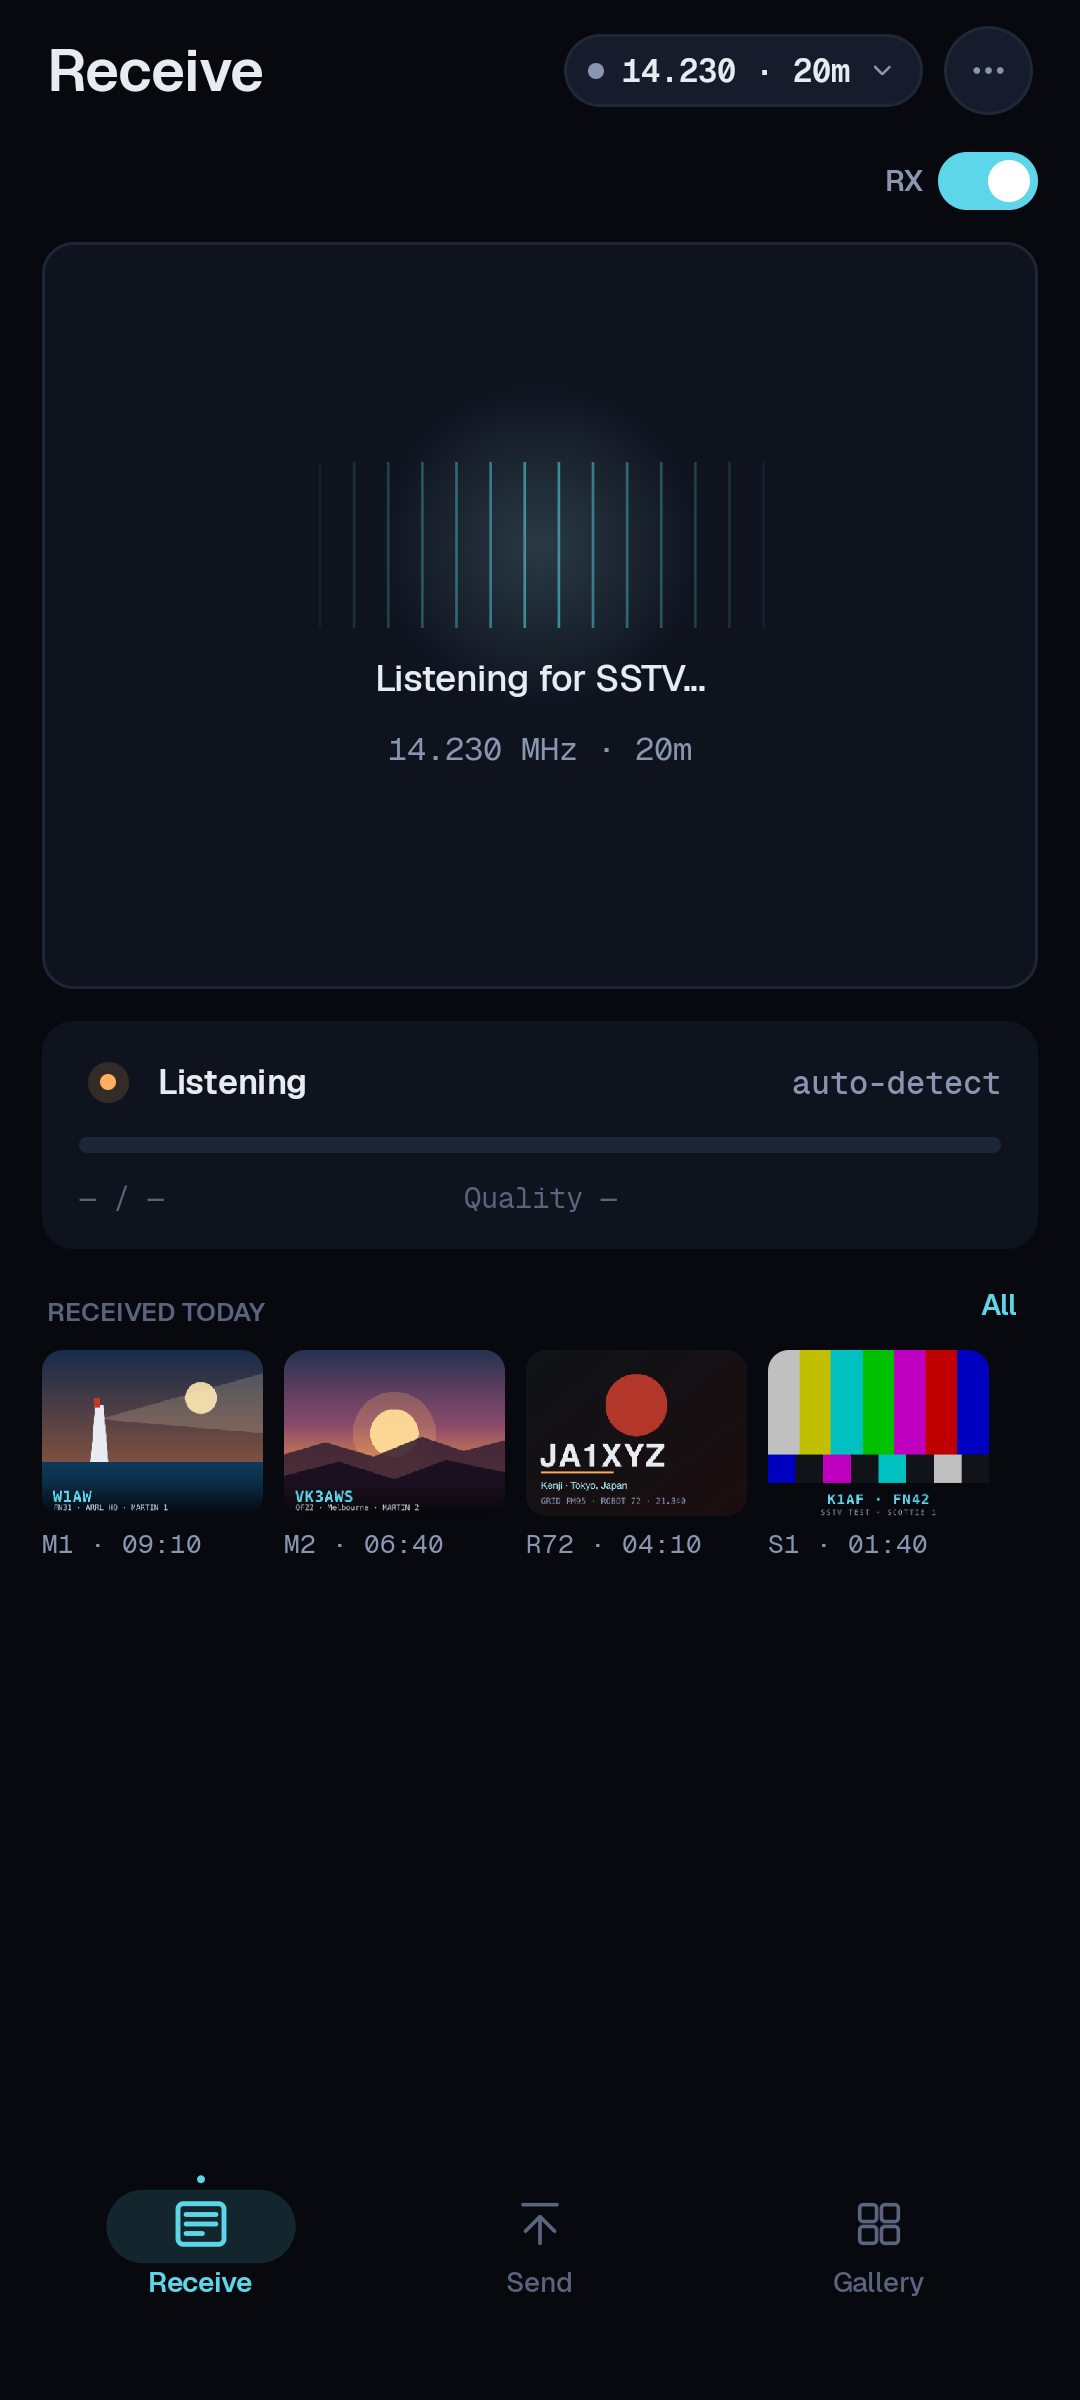
While an image comes in you'll see:
- Mode
- The SSTV mode, read automatically from the VIS header —
Scottie 1,Martin 1,PD 120, and so on. - Progress
- How far down the frame the decode has reached. A full picture takes roughly one to two minutes depending on mode.
- Quality
- A live signal-quality readout — a percentage and a label like
88% · Excellent— showing how clean the copy is as the picture builds. - Slant
- Automatic slant correction keeps lines square. If a picture leans, a small manual nudge is available.
- Save
- Finished pictures drop straight into the gallery, stamped with time, frequency and mode.
5Tune it in
SSTV lives in an ordinary SSB voice passband, so there's no zero-beat to chase. Put the rig in USB on an SSTV calling frequency and let a picture start — SSTV-AF shows a live signal-quality readout, a percentage with a label like Excellent, that climbs as the copy comes in clean.
Tuning is forgiving. Automatic slant / skew correction handles sound-card clock drift, so a small offset won't ruin a picture — but a badly mistuned signal shifts the colors, so nudge it until the quality reads high and the image looks square.
6Send an image
Sending a picture takes three choices — what, which mode, and go:
- Pick a picture. Tap Send and choose an image from your gallery or snap one with the camera. SSTV-AF fits it to the SSTV aspect ratio and can burn in your callsign or a caption.
- Choose a mode and transmit. Pick a mode (
Scottie 1andMartin 1are common on HF;Robot 36is quick on VHF FM), then hit Send. SSTV-AF keys the rig over CAT and plays out the tones.
Keep an eye on ALC as you transmit — SSTV is a constant-carrier mode, so drive it like a data signal: enough for a clean output, not so much that ALC pumps. Give listeners a moment to get ready before you start, and stay inside the band plan.
7Make a picture QSO
An SSTV contact is a friendly exchange of pictures. The usual rhythm:
Call on the calling frequency, or answer someone sending CQ. Send a picture with your callsign, grid and an RSV report (readability, strength, video) overlaid; they send one back. When you've both copied, log the contact — and the image you received is already saved in the gallery to prove it.
8Logging & uploads
Every contact you log is written to the on-device Logbook tab. If you've configured upload services, it also flies up to them the moment you save — and the whole book exports to ADIF whenever you want.
595 / 575
599 / 588
575 / 569
Cloudlog / Wavelog
Open Settings → Cloudlog, paste your Cloudlog (or Wavelog) URL and API key, and toggle the service on. New QSOs upload automatically; a failed upload stays in the logbook with a retry indicator.
ADIF export
Prefer to keep your own files? Settings → Export writes a standard ADIF file you can import into any logger — N3FJP, Log4OM, or a LoTW upload tool, whatever you use.
You can do both — upload live to Cloudlog/Wavelog and export ADIF at the end of the night for your master log.
9Field tips
- Set your clock from the network before a session. Accurate time isn't as critical for SSTV as it is for FT8, but it keeps your log honest — Android's automatic time is usually fine.
- Use the hardware volume buttons to set TX drive mid-transmission, so you can trim ALC without reaching for the on-screen slider.
- Listen for the tones to spot SSTV activity — the warble is unmistakable on a calling frequency, and the quality readout climbs the moment you land a clean signal.
- Keep your overlay legible — callsign and grid in a corner, high-contrast, so they survive a marginal path.
- Star the GitHub repo if you want a nudge when a new release lands.
Something not behaving?
Read the next page: it walks you through capturing the debug log so we can actually fix what you ran into. Reporting a bug →